By Aubrey Costello
Photos by Hillary Ehlen

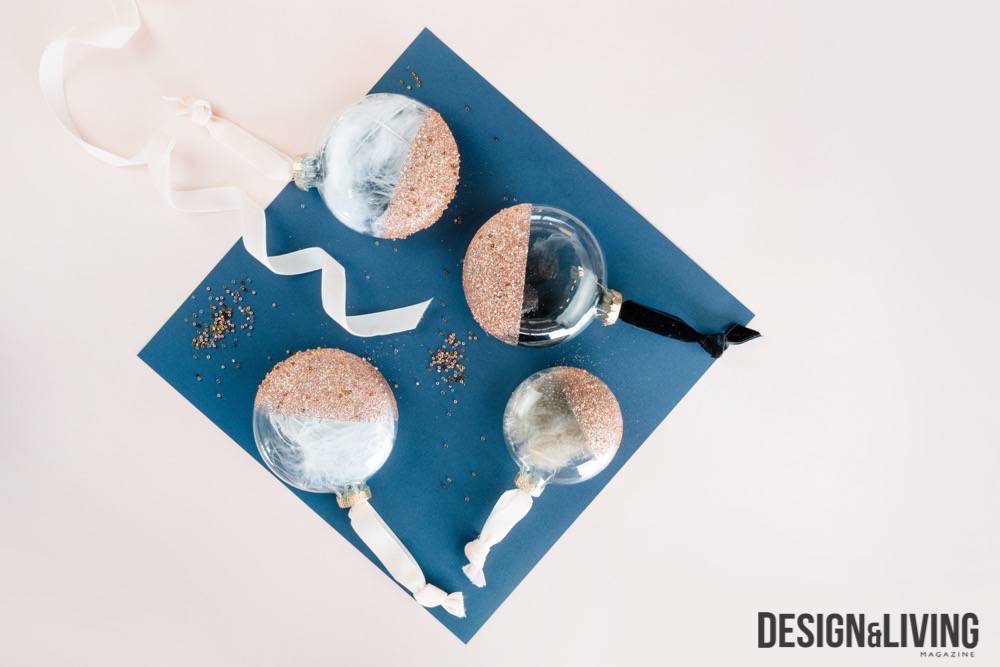
Hello! I’m Aubrey Costello, the creator of Birchwood Dream—a lifestyle blog focused on seasonal home styling, DIY decor and home organization. I’m here with two on-trend ornament tutorials for you to try at home. Whether or not you consider yourself to be a DIY enthusiast, these ornaments are the perfect holiday craft. For those with little helpers, just be sure to supervise the steps with spray paint and don’t be afraid of messy hands! See the instructions below to begin.
Ornament One
Supply List
- Spray Adhesive
- Clear Glass Disc Ornaments – used 4″ and 3.15″ diameters
- Design Master 24KT Pure Gold Spray Paint
- Clear Glitter Sealer – Krylon Glitter Blast Clear Sealer
- Rose Gold Fine Glitter
- Dazzle-It 10/0 Czech Glass Seed Beads in Copper Mix
- 5/8″ Velvet Ribbon in Blush by Sugar Paper
- Masking or Painter’s Tape
- Feathers in your choice of color
- Wooden Dowels or Chop Stick
- Styrofoam board
- Scissors

Step 1 | Tape off ornament

Apply the tape at an angle towards the middle to bottom half of the ornament, leaving behind the area you want to add glitter and seed beads. Make sure that the tape aligns where the two ends overlap, to get a clean line.
Step 2 | Spray Ornament with Spray Adhesive
With using the spray adhesive it drys quickly so you need to apply the seeds beads and glitter as soon as possible. Thoroughly spray the exposed part of the ornament with spray adhesive.
Step 3 | Apply Seed Beads
Sprinkle the seed beads onto the adhesive until happy with the amount of beads.
Step 4 | Sprinkle with Glitter

Sprinkle liberally with the glitter. Continue working on both sides and bottom of the ornament until it is completely covered. Spray glittered area with clear sealer to prevent the glitter from flaking and fading. Set aside to dry.
Step 5 | Spray Ornament Caps

Remove the ornament caps and stick into a Styrofoam board. Spray caps with Design Master 24KT Pure Gold spray paint. Set aside to let dry.
Step 6 | Remove Tape

Once the clear sealer is dry carefully remove the tape.
Step 7 | Insert Feathers into the Ornament

Insert feathers into the ornament, using the dowel or chop stick to adjust and rearrange the feathers.
Step 8 | Add Ornament Cap + Hanger Ribbon

Insert the new gold ornament cap into the top of the ornament. Cut a 12″ piece of velvet ribbon and insert it into the ornament cap, tie the ends into a knot.

Voila!
Have fun and experiment with different glitter colors and different types of feathers. A beautiful new ornament for your Christmas tree or to gift to someone special!
Ornament Two
Supply List
- Clear Glass Ornament – I used 4″ Diameter
- MTN 94 Spray Paint in Poseydon Blue – Matte Finish
- Design Master 24KT Pure Gold Spray Paint
- Wooden Dowels
- Styrofoam Board
- White Paint Pen
- 5/8″ Velvet Ribbon in Black by Sugar Paper
- Scissors

Step 1 | Prep Ornament

Remove the ornament caps. Place ornaments upright into box and place in an area protected from spray paint.
Step 2 | Spray Top of Ornament

Spray top with Poseydon Blue spray paint. You want light coats of spray paint to avoid paint runs.
Step 3 | Flip Ornament
While ornament is still wet, insert two dowels into ornament and carefully flip the ornament. Inserting the dowels into Styrofoam board.
Step 4 | Spray Bottom of Ornament

Spray the bottom and sides of the ornament with Poseydon Blue spray paint, completely covering ornament. Let dry.
If needed, add another coat of paint and let dry.
Step 5 | Spray Ornament Caps

Stick ornament caps into styrofoam board. Spray caps with Design Master 24KT Pure Gold spray paint. Set aside to let dry.
Step 6 | Add Stars

Using the white paint pen, draw stars onto the ornament. Vary the placement and size of the stars.
Step 7 | Add Ornament Cap + Hanger Ribbon

Insert the new gold ornament cap into the top of the ornament. Cut a 12″ piece of velvet ribbon and insert into the ornament cap, tie the ends into a knot.

Voila!
A beautiful new ornament for your Christmas tree or to gift to someone special.
For more fun, follow Aubrey at BirchwoodDream.com and on social media @birchwooddream.