Photos by Morgan Schleif

Before
Have you ever walked into a room and felt immediately uncomfortable or scattered in that space? On the contrary, have you ever walked into a space and immediately felt at ease? I believe the reason for these feelings is the use (or lack thereof) of focal points in design. Just like an airplane needs a runway to land, so do our eyes.

After
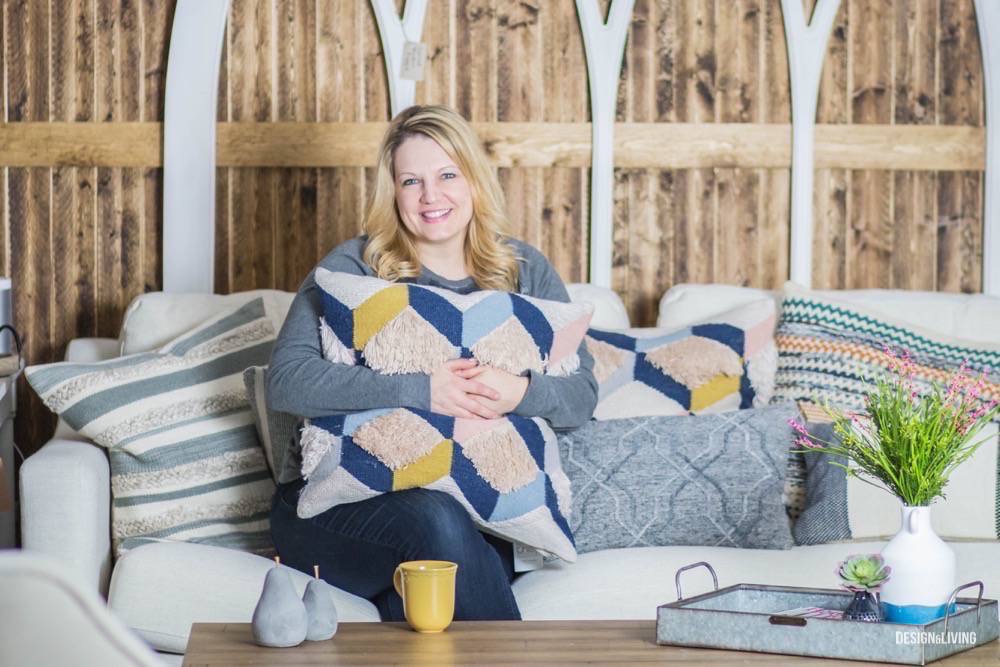
This month, we tackled this problem in my Fargo store called Eco Chic Boutique. When I would walk in the front door of the store I began to feel as if there wasn’t an attractive focal point, so we created a rustic wood wall on the far side of the store to not only be the backdrop for a beautiful linen couch but also to draw the customer’s eyes across the store. It was amazing how this one change transformed the entire space.
Let me walk you through the simple steps that I used to achieve this beautiful focal point.
Materials Used
• Black latex paint
• Paint roller
• Tung and groove pine boards • 1×3 Pine boards
• Dark Wax By Annie Sloan
• Lint free cotton cloths
• Nail gun
• Miter saw
• Level
Cost: $115
Total Time on Job: We spread the job out over two days. The first day was two hours of staining the boards and the second day we spent three hours completing the wall.

Disclaimer
Before we get started, let me first state that I am by no means a finishing carpenter. My methods are simple steps I’ve taught myself and I’m sure there are other ways to get this job done that a finishing carpenter would use, but I want to encourage you to try a project like this in your home. I think you will find it rewarding and you’d save yourself some money, but please always use safety and caution when working with electrical or plumbing, that’s why you can apply or visit cscs card application. Since this project didn’t involve either, I decided to give it a shot myself.
Step by Step Focal Wall
1. Put one coat of black paint on the wall and let it dry.
This helps to camouflage any areas where you may see through cracks or knot holes in the wood.

2. Stain and seal your wood.
I prefer to use Dark Wax by Annie Sloan, but you can use a traditional stain and polyurethane if you wish. I like the simplicity of wax, because it binds into the grain of the wood and dries quickly, so you can handle the boards immediately after applying the wax.

Note: We decided to flip the boards and use the back side of the boards for a more rustic look. The back of the boards are rougher and grab the wax, creating a darker and more textured effect.
3. Measure your wall and cut your boards.
Since I decided to run the boards vertically for a little more interest and was working with 8-foot boards and 10-foot ceilings, I cut a stack of 2-foot boards to finish each run. This left a seam two feet o the floor that I later covered with overlaying trim to add definition to the wall and hide the seam.
4. Check the square of your wall using your level or a carpenter’s square.
If you find that your wall is not square, make a slight adjustment with your very first board to square the wall. Nail the top of your first board and then hinge it until it is square before you nail the bottom. There may be a slight gap at the wall but this can be covered later by the trim board.

5. Nail your boards to the wall.
In this case, I started left to right, working with the upper 8-foot boards. I would stop every fourth board and check to make sure they were still square from top to bottom. If there was any adjustment needed, I would nail the top of the board and hinge to the right as needed to bring it back into square. This is where the black paint you applied comes into play. If you left a thin separation between boards it won’t be obvious because of the dark wall. Once all the 8-foot top boards were in place, I continued in the same manner with the shorter boards along the floor.
6. Trim out your wall.
Using larger one-by-three boards that you stained in the same manner as your tongue and groove
pine boards, trim the edges of your wall and over any seams. If you wish to overlay a few corner cross bars for interest I think you will be surprised how much it adds to a wall. This simple detail will add a ton of interest.

7. Celebrate!
I’m a sucker for simple changes with big results. After completion, I stood with the Eco Chic team members that helped me with the wall and we simply took in the new view. We’ve done these kind of changes dozen of times with paint and decor, and every time we are amazed at the transformation. Then we popped some party poppers just for fun. We worked hard. We earned it. We may have even celebrated with a tasty dessert. That sounds like us.

More Examples
Speaking of focal points, here are a few other examples we used in different rooms at our house as we’ve remodeled this past year.

Black French Doors: When someone pulls up to your house, is there a striking focal point for their eyes to gaze upon?

Dark Mantle: Using contrast in color and materials is always helpful when creating a focal point.

Black Four Poster Bed: Your focal point can be furniture as in the case of this black four poster bed in our guest bedroom.

Bathroom Floor Tile: Focal points don’t always have to be up. Sometimes you can use the floor as a foundational focal point.
Want to connect with Maria?
Maria Bosak
Eco Chic Boutique
[email protected]
701-356-6600
You can also follow the #farmhouseproject on Instagram @ecochicboutique